Author Topic: My CD player install  (Read 19819 times)

Offline 1979C20

  • Senior Member
  • ****
  • Posts: 1659
  • Kyle Taulton.
My CD player install
« on: May 02, 2011, 04:30:19 AM »
First off, Thank you 87OldYeller for the CD player. I love it.

I used the metal cage that comes on the cd player to mark my bezel, cut the bezel, then used the bezel to mark the dash. I used a pneumatic cut off wheel.


The only "boo boo" I made with the cut off wheel, it slipped and took some paint off of the dash. :/

I made the color purple to match my headlights. There are 30,000 color variations, and you can adjust the red, green, and blue to get the color you want.

And here is how it all looks.
1979 SCLB C20 Q-jet 350 SM465 14b F.F. 4.10 G80
1989 GMC Suburban V2500 TBI350 TH400 4in lift 35's 14b SF

Offline 1979C20

  • Senior Member
  • ****
  • Posts: 1659
  • Kyle Taulton.
Re: My CD player install
« Reply #1 on: May 02, 2011, 05:12:41 AM »
My dad had given me a set of OLD MTX road thunder 8" subs. And they just werent hitting to my liking. So, He gave me the old 10" MTX subs out of the jeep, replaced with Kicker 12"s.

I was able to cut out the box and make the 10's fit,

I removed the 8's and laid the 10 down where I wanted it and traced it.

Then I measured the mounting lip around the edge of the 10 and subtracted that from the traced circle.


I cut the carpet away with a knife and then cut the circle out with a Jigsaw.

Ive already blown one of the subs, sadly. So I'm looking for 2 more 10's and a bigger amp.
1979 SCLB C20 Q-jet 350 SM465 14b F.F. 4.10 G80
1989 GMC Suburban V2500 TBI350 TH400 4in lift 35's 14b SF

Offline 79 chevy

  • Newbie
  • Posts: 53
Re: My CD player install
« Reply #2 on: May 02, 2011, 05:43:33 PM »
Nice job on the radio install looks good!! To bad blew one all ready :(
79 Chevy 4x4
Stock for now:)

Offline bake74

  • Senior Member
  • ****
  • Posts: 5871
    • Build Thread
Re: My CD player install
« Reply #3 on: May 02, 2011, 05:49:15 PM »
     Get some touch up paing for the dash and nobody will ever know.
#1: The easiest and most obvious solution to any problem is 99% of the time correct.
#2: There is no such thing as impossible, it just takes longer.
  74 k10, 77k10    Tom

Offline beastie_3

  • Senior Member
  • ****
  • Posts: 3170
  • Josh
    • My truck pics
Re: My CD player install
« Reply #4 on: May 02, 2011, 05:58:39 PM »
that looks good. the problem I had with my DIN was that it sat too far in to attach the head unit trim when the stock bezel was on.

Offline 1979C20

  • Senior Member
  • ****
  • Posts: 1659
  • Kyle Taulton.
Re: My CD player install
« Reply #5 on: May 02, 2011, 11:50:34 PM »
Thanks guys. I was able to clip the head unit trim "beauty ring" to the dash bezel itself.
1979 SCLB C20 Q-jet 350 SM465 14b F.F. 4.10 G80
1989 GMC Suburban V2500 TBI350 TH400 4in lift 35's 14b SF

Offline 1979C20

  • Senior Member
  • ****
  • Posts: 1659
  • Kyle Taulton.
Re: My CD player install
« Reply #6 on: August 27, 2011, 08:01:52 AM »
Well, My buddy sold me a set of Old style Rockford Fosgate 10" punches for $50. But, they were a very deep sub. So they wouldnt fit in my boxes. I went to Home Depot and bought a 2' x 4' sheet of 3/4 MDF for 10 bucks and I cut out 2 10" spacer rings with the jig saw. The subs are about 1/8th inch from the back of the box, and they dont sound very good due to no air movement. I removed the ports and the horn tweeter from the top of the box and plugged it, but it still doesnt sound too great. So I decided to build a custom box which I will hopefully be doing tomorrow. Here is what I have currently.


And here is what I am building

Where the Green part and the red part come together will be connected inside, to allow more space between the subs for air movement. The Red part face is flat, where the green part is angle to fit the angle of the seat. The red part is flat faced to bolt the amp to as seen in the pictures.


1979 SCLB C20 Q-jet 350 SM465 14b F.F. 4.10 G80
1989 GMC Suburban V2500 TBI350 TH400 4in lift 35's 14b SF

Offline Irish_Alley

  • Tim
  • Global Moderator
  • Senior Member
  • *****
  • Posts: 13319
  • Family is not an important thing. It's everything.
Re: My CD player install
« Reply #7 on: August 27, 2011, 08:33:05 AM »
now what are you going to put in your new truck
If you can’t tell yourself the truth, who can you tell it to?~Irish_Alley

When you have eliminated the impossible, whatever remains, however improbable, must be the truth ~Sherlock Holmes

Offline 1979C20

  • Senior Member
  • ****
  • Posts: 1659
  • Kyle Taulton.
Re: My CD player install
« Reply #8 on: August 27, 2011, 05:41:58 PM »
Probably the old boxes with some shallow mount 10's and a decent stereo if it doesnt already have one. And im going to put my Sirius radio in my K20 since sirius is the only thing that gets signal out offroading.
1979 SCLB C20 Q-jet 350 SM465 14b F.F. 4.10 G80
1989 GMC Suburban V2500 TBI350 TH400 4in lift 35's 14b SF

Offline big bear

  • Junior Member
  • ***
  • Posts: 681
Re: My CD player install
« Reply #9 on: August 27, 2011, 05:57:07 PM »
very kool man

Offline 1979C20

  • Senior Member
  • ****
  • Posts: 1659
  • Kyle Taulton.
Re: My CD player install
« Reply #10 on: September 14, 2011, 06:20:28 PM »
Update!! I got the box built. Took me about a week because I took my time. A little bit each day. Heres the pictures I took from the first to the finished product in order.
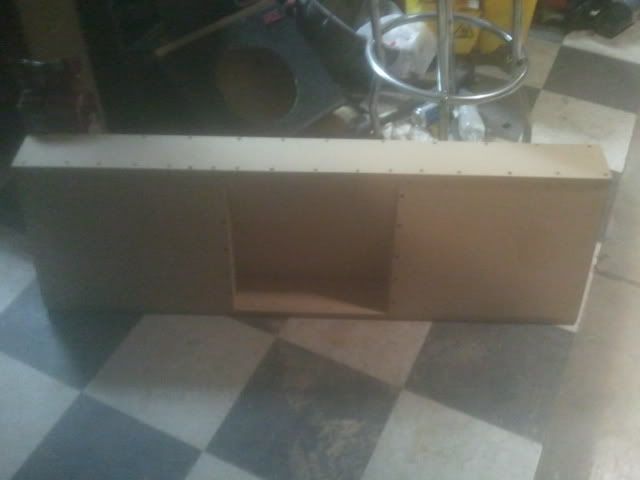
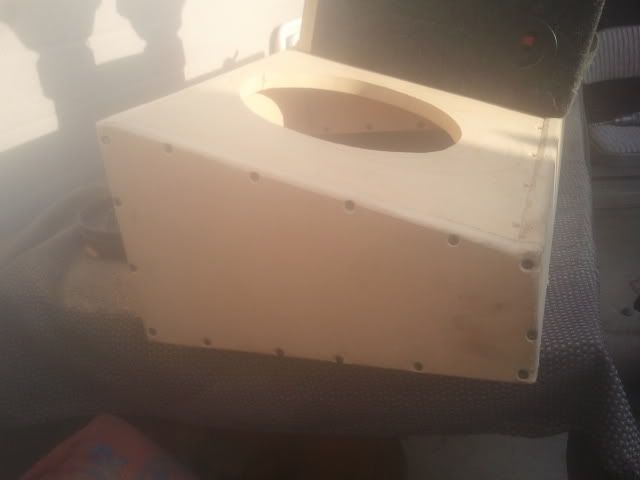
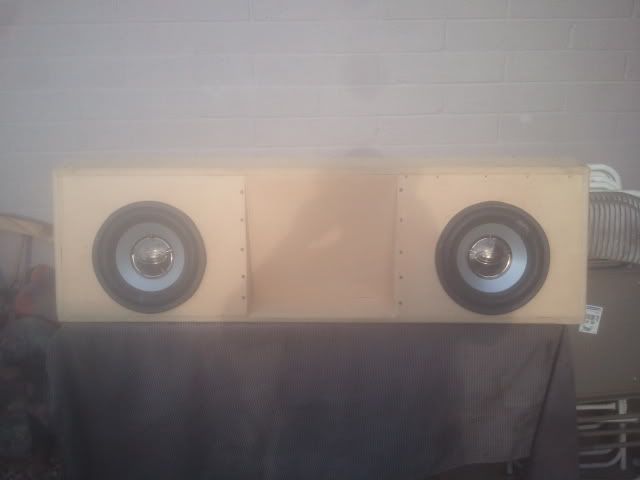
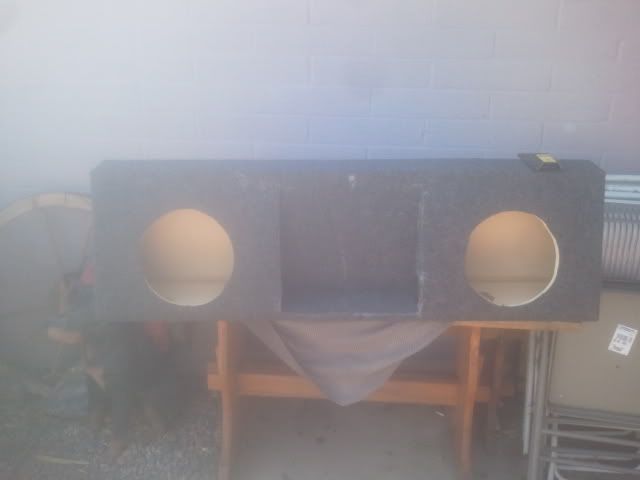
Front


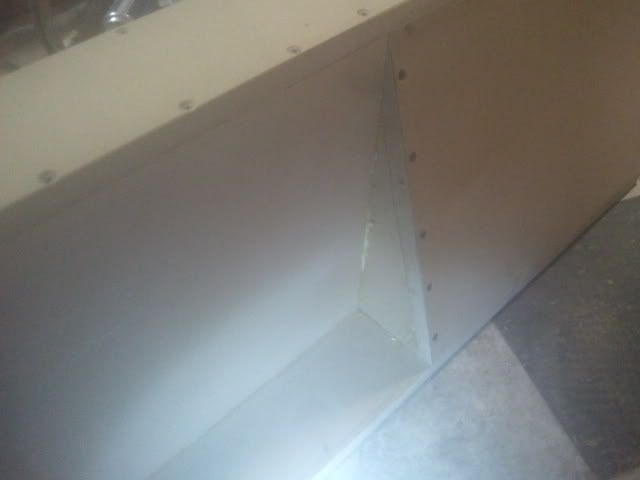
This shows the wedge corners where the amp goes


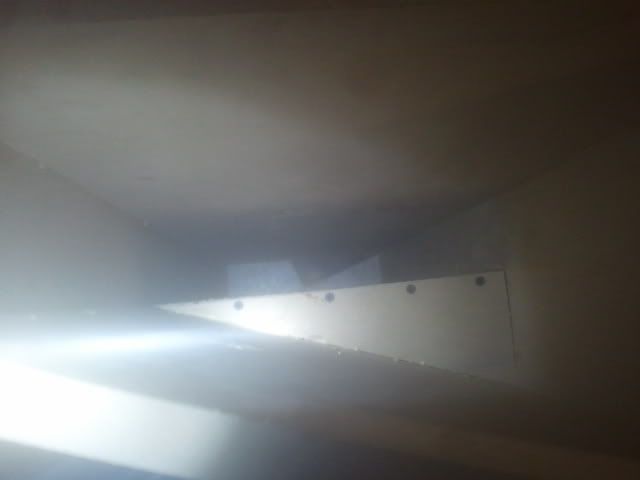
Heres inside from one side to the other, before I put the end pieces on.


Heres from the back side. I think I went a bit overboard with the screws, But at least I know it will hold up to quite a bit.


I pre-drilled and counter-sunk all of the holes as to not split the MDF


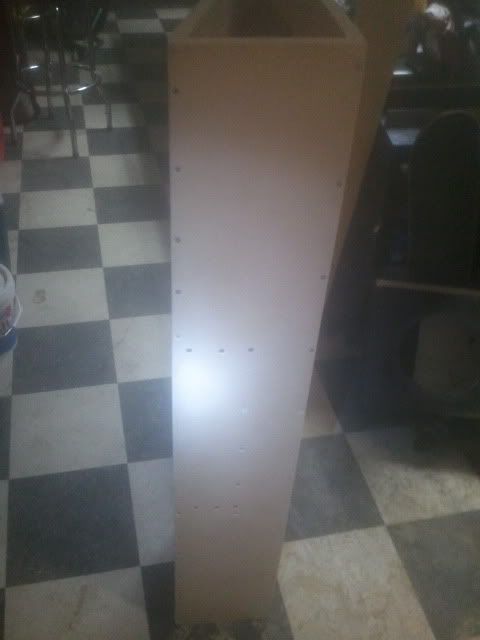
Here is the end piece. I cut out a piece bigger than the end, And my dad routed it to shape with his handheld.


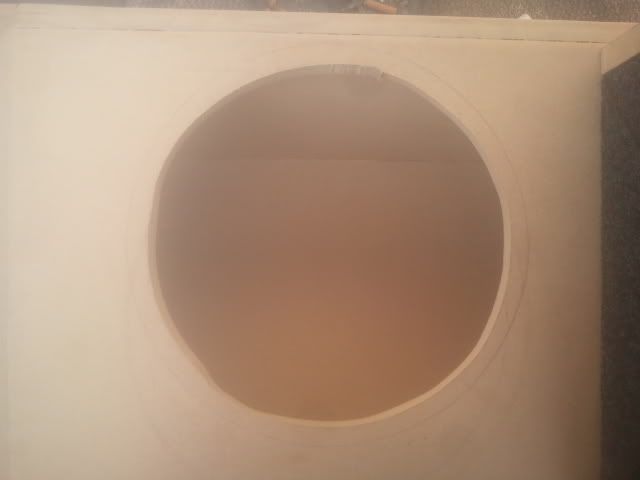
Cut the holes out for the subs. Not too bad with only a Jigsaw.


Other hole.


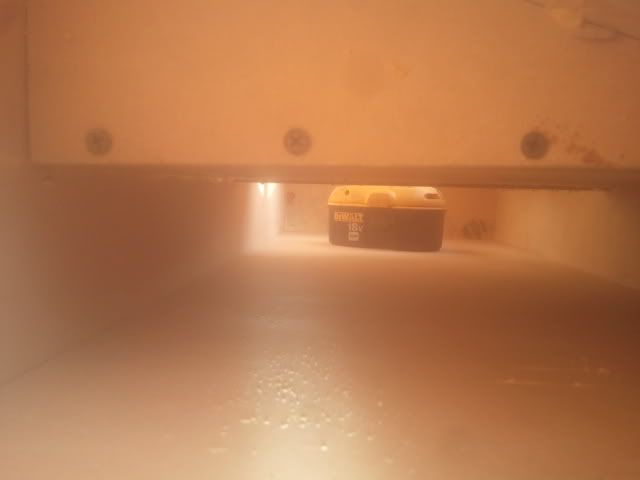
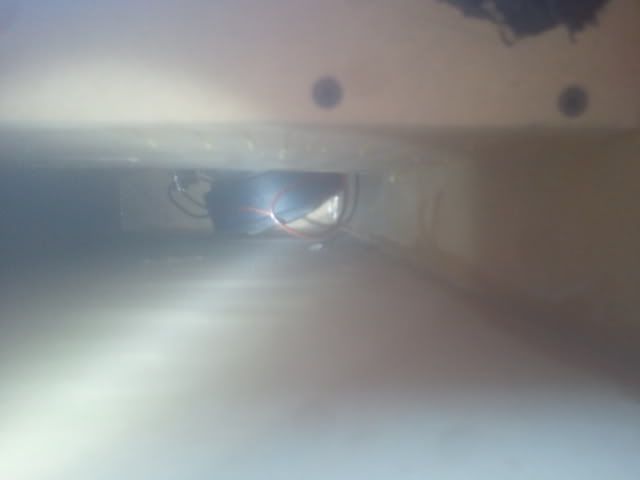
Just to show the gap behind the amp rack and between the subs.


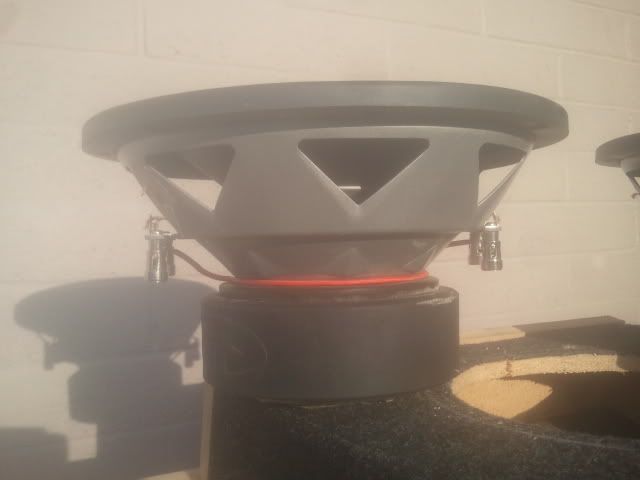
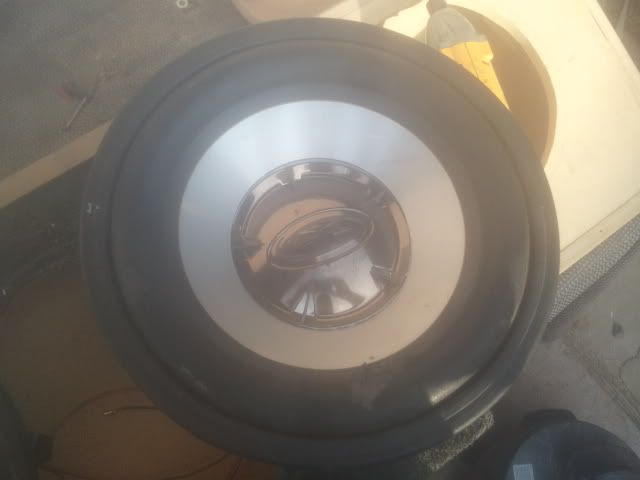
And here is my subs. Rockford Fosgate Punch HE2's. The old style. Theyre 800 watts max each, Dual voice coils, 2 or 4 ohm


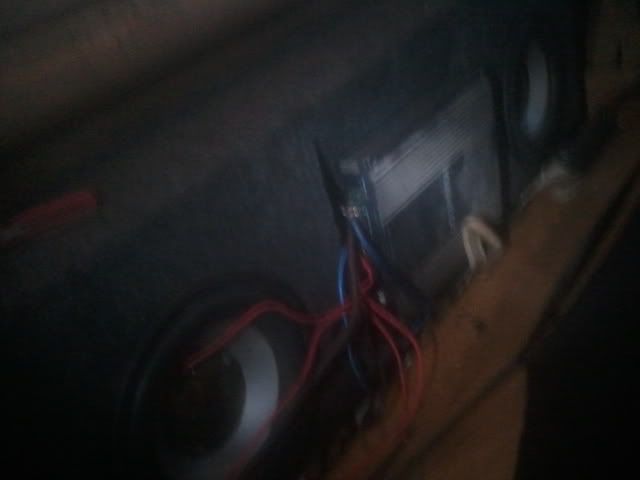
Here they are installed


And here is the box carpeted.


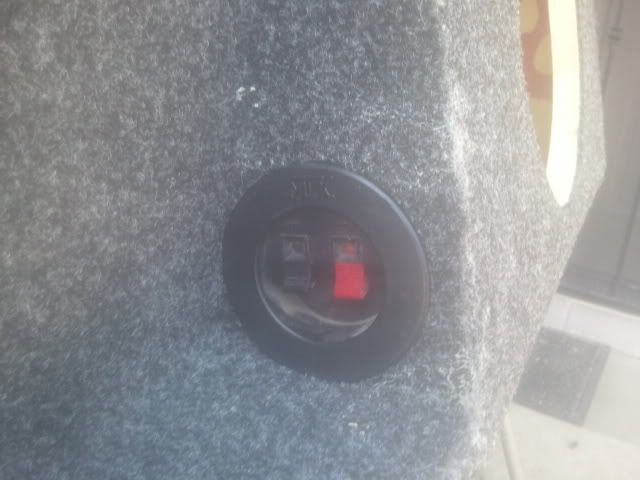
I added these speaker plugs in the wedge corner area next to the amp.


This picture shows the clearance behind the sub to the back of the box.


And heres a crappy picture of them behind my seat.


They sound AWESOME. They shake the crap out of my slider windows and they even rattle my necklace full of monster tabs on my mirror. Its not too loud outside the truck, but sounds great inside. And its only a 200 watt amp powering 1600 watts of sub. I'm very satisfied. I looked up the specs for the subs, It said for 1 sub in a sealed enclosure to use .75cu" of space. I used a calculator online to calculate the cu" of my box and it came out to 1.50282cu". So I built the box perfect for the subs without even knowing it.

The box measures

48"wide
8.25" bottom
4.5" top
14" tall
The face is on a 75 degree angle
All the angled joints are miter cut to 15 degrees (75+15=90)
All of the corners are rounded with a router
I used standard Elmers wood glue on all of the joints.
I used Rubberized clear Caulking in all of the internal corners.
I predrilled all of the holes with a 1/8th bit. About 1/16th smaller than the center shaft of my screws.
I used a roll of sub enclosure carpet my dad had in the attic
I adhered to the box with 3M's Spray 90 spray glue.
I used 1 5/8ths wood screws.

Overall cost

2 x -  2'x4' 3/4 MDF                             $8.75ea    Home Depot
1 x -  Elemer's Standard Wood Glue        $7.30       Home Depot
   x -  Screws                                     Free at home
1 x -  Rubberized Clear Caulking             $7.00       Ace Hardware
1 x -  3M Spray 90 Glue 30oz Can          $18.00     Ace Hardware
   x -  Carpet                                      Free at home
2 x -  Speaker Plugs                             Free at home from old boxes
   x -  Wire                                         Free at home
2 x -  Rockford Fosgate HE2 10" subs     $50          Friend
1 x -  Kenwood KAC-921 200w amp        Free from neighbor
1 x -  JVC Stereo                                $100        From 87OldYeller
2 x -  Jensen 6x9's                              Free in truck when I bought it
OVERALL         $199.80

So 200 Bucks For a kickin sound system. And 50 bucks to build the sub box.Thanks for reading, sorry it was long.
1979 SCLB C20 Q-jet 350 SM465 14b F.F. 4.10 G80
1989 GMC Suburban V2500 TBI350 TH400 4in lift 35's 14b SF

Offline 69byrd

  • Senior Member
  • ****
  • Posts: 1167
  • Haulin!
Re: My CD player install
« Reply #11 on: September 14, 2011, 06:31:21 PM »
Cant go wrong with fosgates they soung great! Good job
84 C-10 Stepside       
54 Chevy Truck
Gotta Love Those Stepsides!
http://s493.photobucket.com/albums/rr299/69byrd/?start=all

Offline 1979C20

  • Senior Member
  • ****
  • Posts: 1659
  • Kyle Taulton.
Re: My CD player install
« Reply #12 on: September 15, 2011, 08:36:27 PM »
Thanks. Yeah, they sound awesome. My parents have used fosgates since they were in highschool.
1979 SCLB C20 Q-jet 350 SM465 14b F.F. 4.10 G80
1989 GMC Suburban V2500 TBI350 TH400 4in lift 35's 14b SF

Offline BANDOLERO Z-28

  • Newbie
  • Posts: 29
  • Newbie
Re: My CD player install
« Reply #13 on: October 13, 2011, 01:00:46 PM »
Very nice, thanks for sharing all the dimensions and material, I’m thinking of building one for my truck 

Offline jdl71

  • Registered Users
  • *
  • Posts: 145
Re: My CD player install
« Reply #14 on: October 13, 2011, 05:46:25 PM »
Thanks. Yeah, they sound awesome. My parents have used fosgates since they were in highschool.

Nice write up.

I must be about the same age as your parents then, I use to have Punch 45's when I was in high school. Alpine head unit and Orion Redline amp. Ask 'em sometime if they had the "Oakley" windshield sticker. How I miss the 80's.  :D