Author Topic: Rear tank fill location  (Read 4499 times)

Offline regulator522

  • Newbie
  • Posts: 15
  • Rebel Soul
Rear tank fill location
« on: May 09, 2014, 11:09:33 pm »
Relocating gas tank to rear, does anyone know where on the truck this would be. I know it would be under the wood, but not sure if I will have much room to route anywhere? wanted to go behind plate of a rollpan, but pretty sure this is to high. 82 stepside with wood bed

Offline bake74

  • Senior Member
  • ****
  • Posts: 5871
    • Build Thread
Re: Rear tank fill location
« Reply #1 on: May 10, 2014, 07:58:01 am »
     Here's Capt's blazer tank install on his 87 r10.  This might give you some idea's.
« Last Edit: May 10, 2014, 06:31:49 pm by bake74 »
#1: The easiest and most obvious solution to any problem is 99% of the time correct.
#2: There is no such thing as impossible, it just takes longer.
  74 k10, 77k10    Tom

Offline DnStClr

  • Senior Member
  • ****
  • Posts: 1806
Re: Rear tank fill location
« Reply #2 on: May 10, 2014, 06:27:16 pm »
Bake it looks like the link didn't highlight....
Don
87 Chevy Silverado

Offline bake74

  • Senior Member
  • ****
  • Posts: 5871
    • Build Thread
Re: Rear tank fill location
« Reply #3 on: May 10, 2014, 06:32:28 pm »
Bake it looks like the link didn't highlight....

     Thanks for the heads up, fixed and checked.   :D
#1: The easiest and most obvious solution to any problem is 99% of the time correct.
#2: There is no such thing as impossible, it just takes longer.
  74 k10, 77k10    Tom

Offline Captkaos

  • OWNER and Administrator
  • Administrator
  • Senior Member
  • *****
  • Posts: 18464
    • http://www.73-87chevytrucks.com
Re: Rear tank fill location
« Reply #4 on: May 13, 2014, 09:55:39 pm »
Unless you plan to mount the tank below the framerail there is no way to run it behind the license plate and still be able to fill it up...

Offline regulator522

  • Newbie
  • Posts: 15
  • Rebel Soul
Re: Rear tank fill location
« Reply #5 on: May 18, 2014, 08:12:13 am »
Thanks guys, Thanks Cap, I relized that by holding up bumper waas hoping the rollpan would get me closer LOL but ended up turning tank, and relized filler neck would fit between wood and frame :-) now just have to figure out where/how I want to run filler


Offline HAULIN IT

  • Senior Member
  • ****
  • Posts: 1542
Re: Rear tank fill location
« Reply #6 on: May 18, 2014, 08:19:45 am »
Looking at your situation, I have a couple thoughts to add.
1) Try to get clear, bright pictures to post...it makes it much easier to see what's going on. In this case, the obvious is there. Can I assume the bed doesn't have a floor in it? I can't figure how you have room to "peel" those pieces of crossmember up like that with the wood in place.
2) When notching an area like you did, think about the strength your removing...I realize many of us (myself included) don't use our trucks for heavy use everyday like originally designed, however a 2" holesaw hole placed where you need the top to be (below the rolled edge) & then the sides cut up to the hole would leave much more strength, look much nicer, ect. The front side I'd guess could have been quite a bit lower than the back based on the curve of the filler neck. If you want to make that look like a "factory" done install (my liking) would be to then bend a piece of 1/2"x 1/8" flat around the notch & weld it in so the ribs would continue up around the filler tube & continue to the other side giving the appearance that GM installed it & the crossmember was made to fit that tank...takes a little more time, but looks, works as proper as can be.
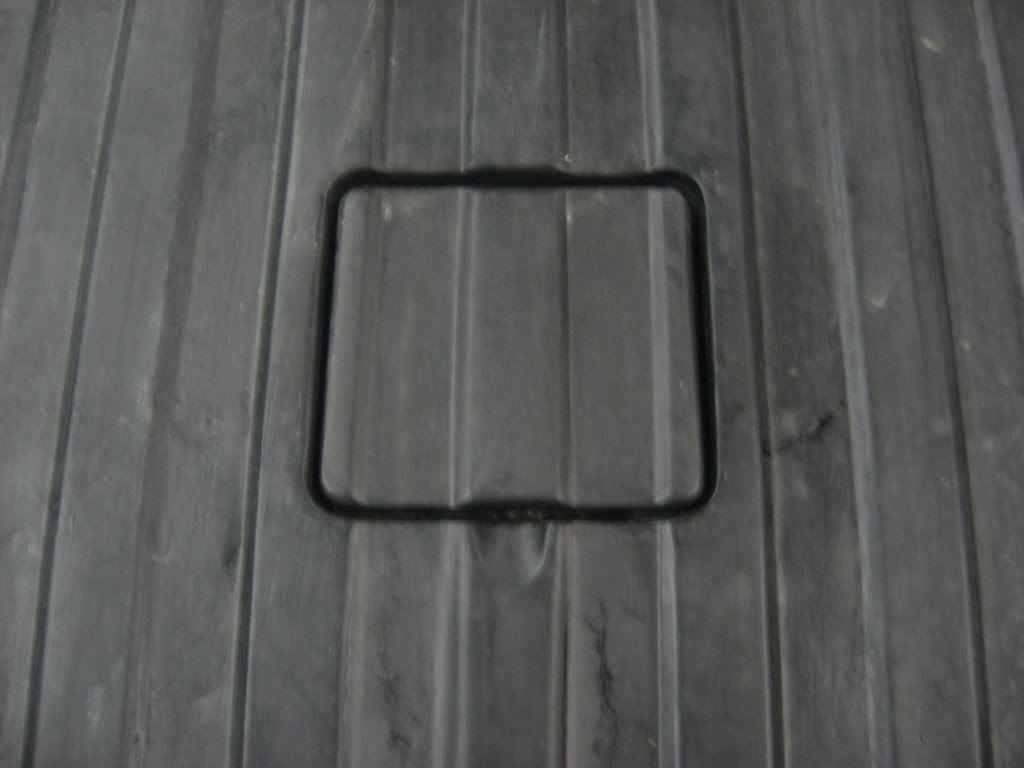
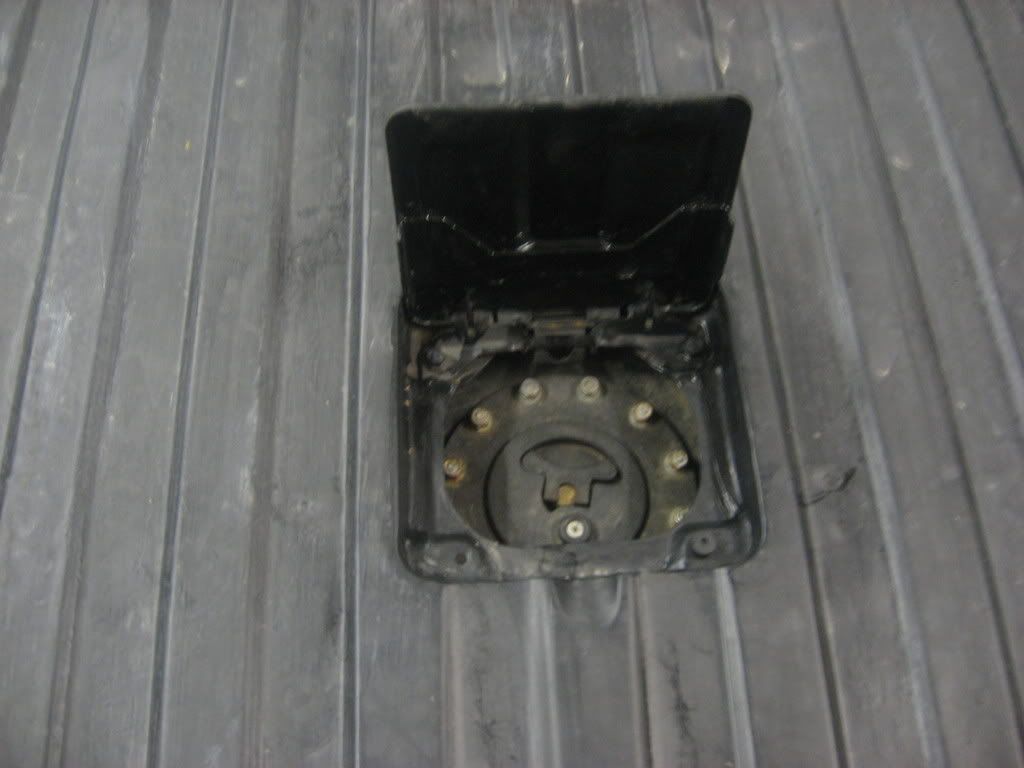
3) At this point, cutting off the neck & attaching a straight tube upward I'd think would likely be your best plan. I did my fuelcell that way & worked out well. Either get an aftermarket cap sold by streetrod suppliers or my thought...with a little effort & a router, a "factory appearing" wooden door could be installed. You would have to thin the board down on the lid so it wouldn't bind against the floor as you tried to open it, but this could be worked out. Here's a couple pictures of what I did...invision a routered area under the surrounding area to place the pocket & a thin sliced section of the board attached to the lid...a little divot in the rear board to stick your finger in. Just my Two Cents, Lorne